

Difficulty: Beginners
Time: 1 hr
Yields: depends on the mold
Remember the yummy popsicles our mum used to make when we were children? Deliciously refreshing and you’d have to warm them in your hands for a moment before you could pop them out of the plastic mold. These ice treats are making a comeback again, and unlike the boring round shapes we used to have, they come in all shapes and forms now, from little cute animals to sophisticated and elegant designs. And making popsicles isn’t just like adding your plain cordial and freezing them, it’s become quite the art form, with plenty of different (and healthy) recipes on the web. Check out this yummy Mango Chamomile popsicle recipe!
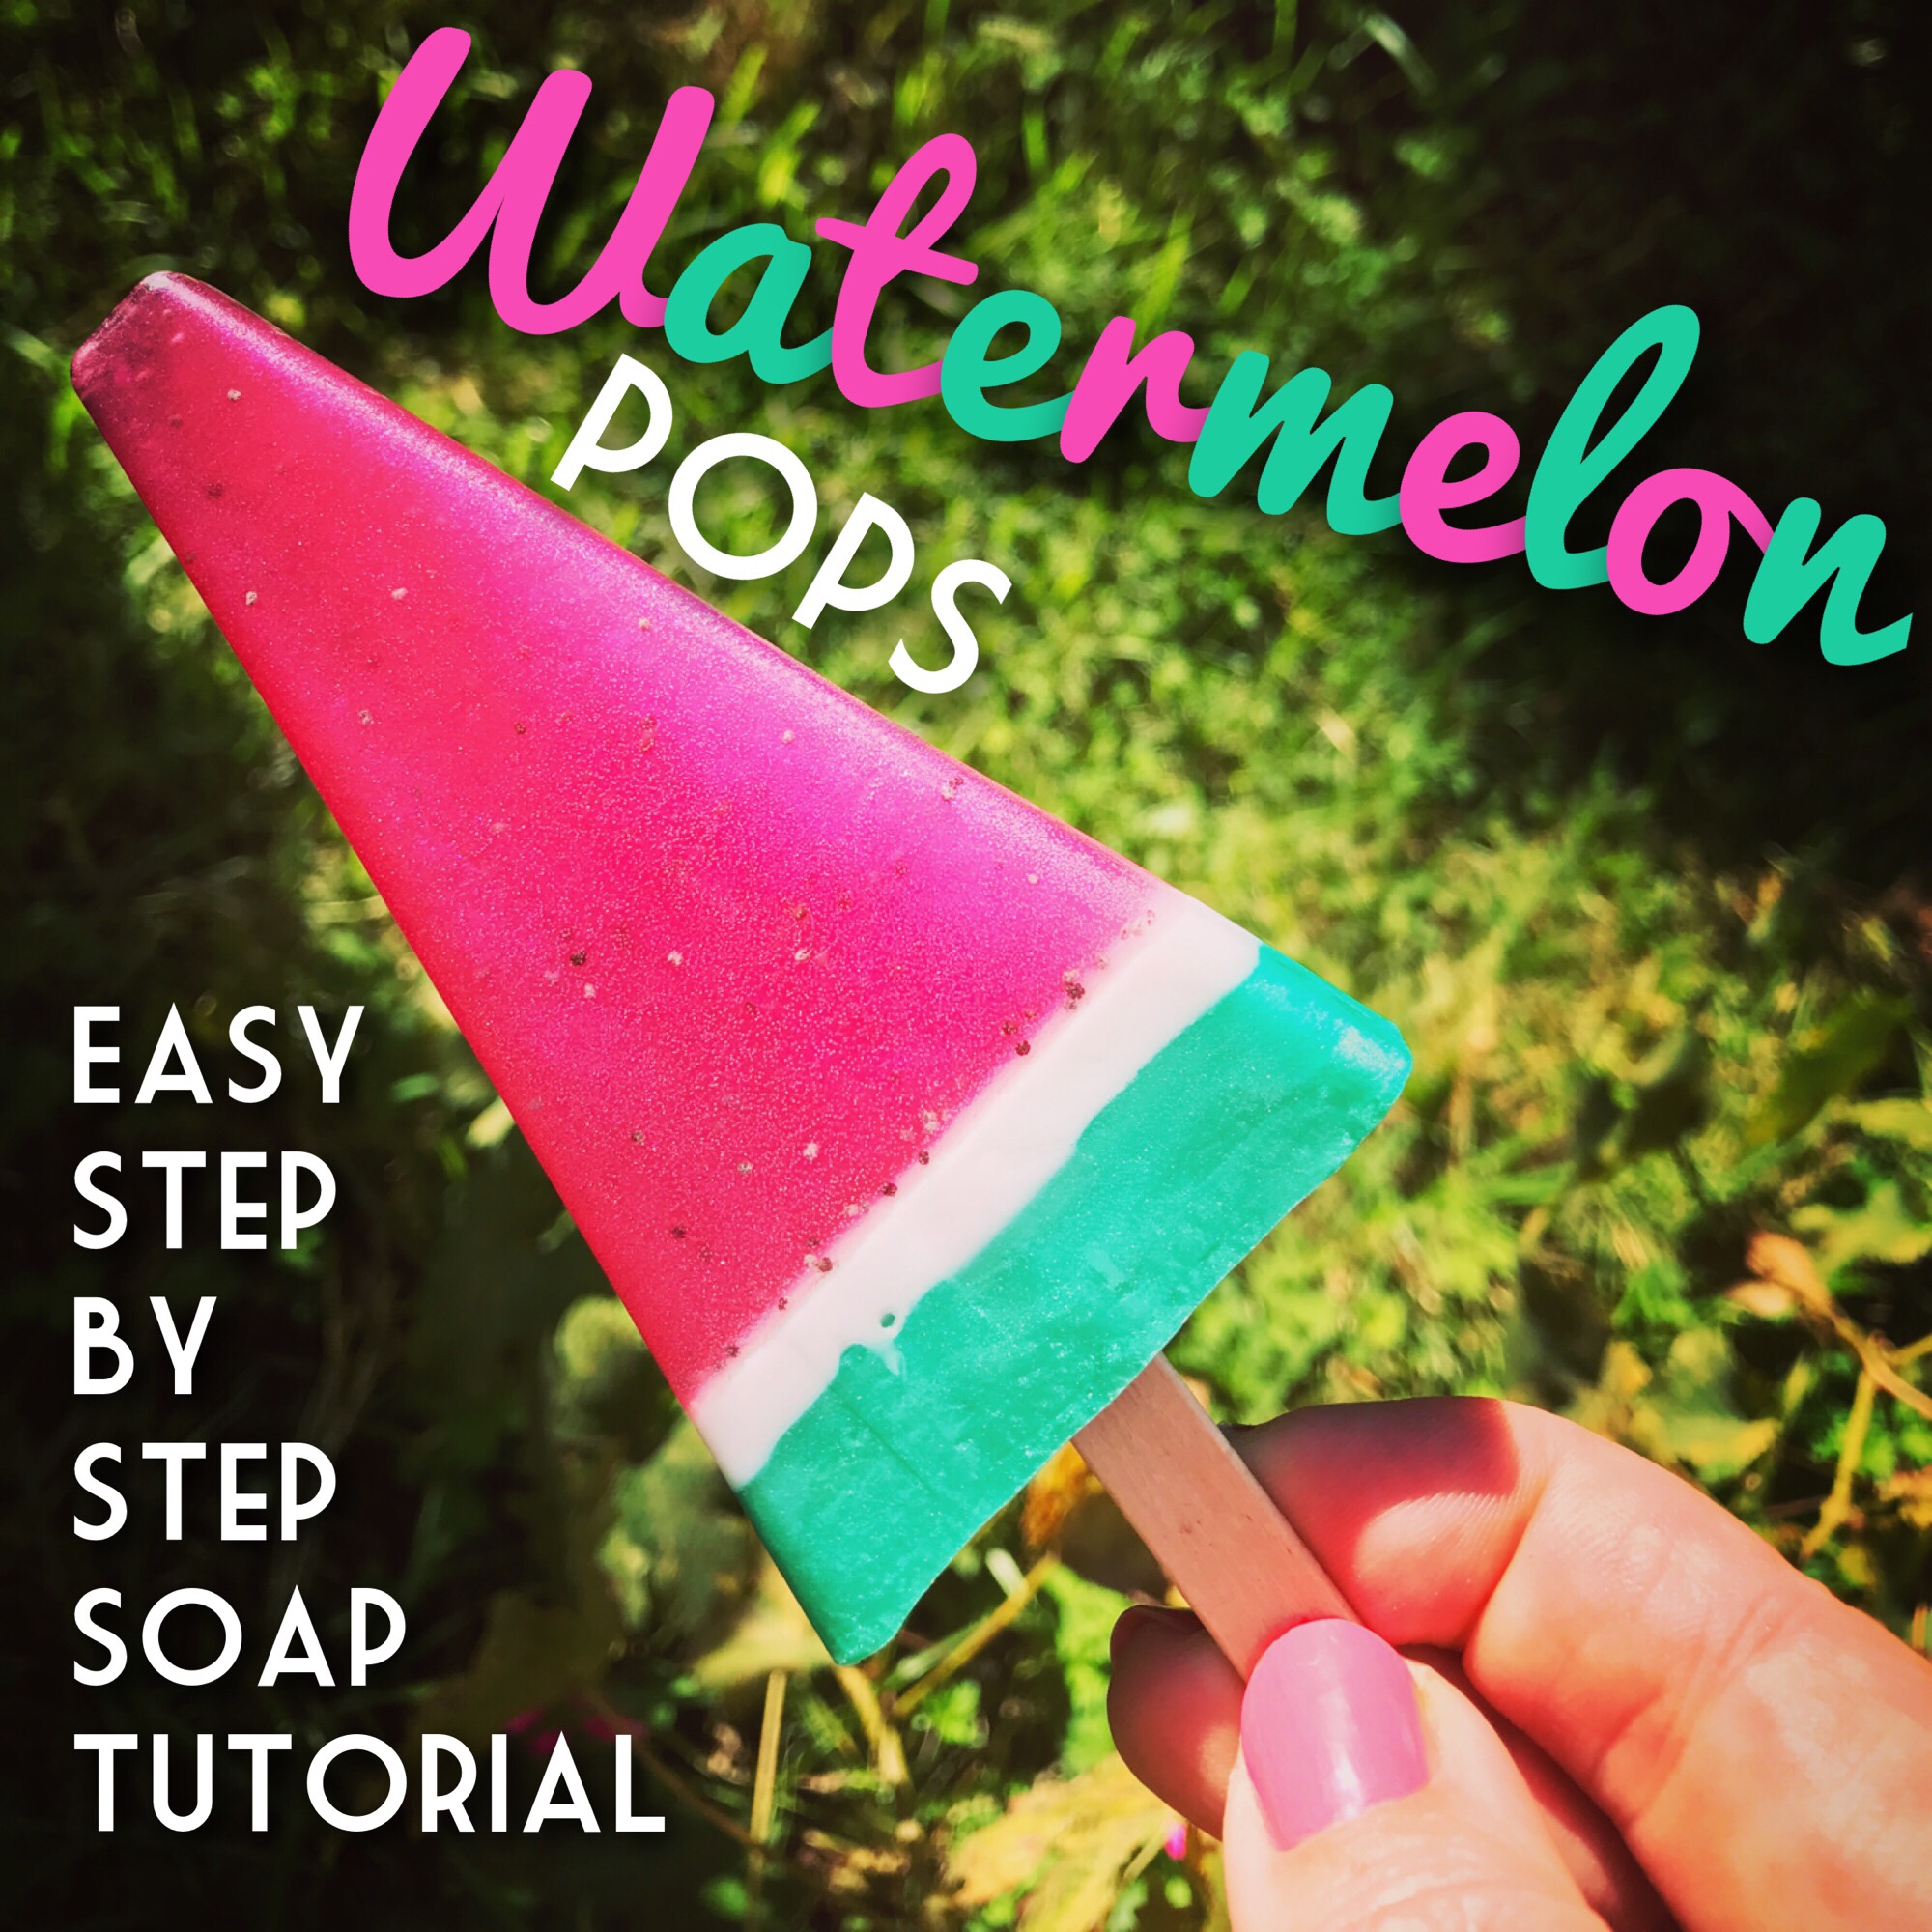
Inspired by the many creations on Pinterest and getting hold of this fun triangle shape mold, these Watermelon Pops are not only fun to look at, but they smell absolutely delicious! And they definitely need to come with a warning label: Not for eating!


For these soaps, you will use the crystal clear melt and pour soap base from SFIC, which gives the watermelon pops a very translucent appearance without any cloudiness you sometimes experience in clear melt and pour soap. You will also need white melt and pour soap base, Sweetheart Rose mica, Green Fruit mica, Watermelon fragrance from Candlescience, popsicle sticks and poppy seeds. You can get all, except for the poppy seeds and popsicle sticks, from Pure Nature. Popsicle sticks and poppy seeds you can buy from the supermarket.
About the molds: You can use any ice pop molds, but personally I prefer to use the silicon ones to the solid plastic ones, because they make it easier to unmold. You can buy ice pop molds at most homeware stores, and I’ve also seen them at The Warehouse, Farmers and some $2 shops. They’re fairly cheap. They come in different sizes and some make four and others more ice pops, so I didn’t give specific amounts of soap base to use. You’ll have to estimate how much you need for your molds.

ONE: Cut enough clear melt and pour soap base into cubes for your mold and add to a heat proof Pyrex jug. Heat on high in the microwave in 10-20 second bursts, until the soap has melted. Try to avoid the soap from reaching boiling point!

TWO: Add your mica and give it a good stir. I am using Sweetheart Rose mica from Pure Nature, which gave me the perfect shade of watermelon pink. I added only about 1/8 teaspoon for the half of cup of melted soap to get the colour I wanted. Add more or less to get your desired shade of pink.


THREE: Add your fragrance (rule of thumb is 1 teaspoon for each cup of melted soap) and sprinkle through some poppy seeds.
Note: additives, such as poppy seeds, in melt and pour soap bases will not mix evenly through the soap once it cools and usually congregate either on top or on the bottom, depending on its weight. This is due to the consistency of the melt and pour soap base. There are other more viscous soap bases, such as the crystal suspending soap base from Stephenson Personal Care, that are specially created to hold particles throughout the soap base.


FOUR: Pour the soap in your soap mold, and add a popsicle stick. To hold the popsicle stick in place I used a tie handle, which I tied around the stick.
Spritz the surface with isopropyl alcohol. This is to disperse any bubbles, but also to prepare the surface, so that the next layer will adhere to it.
Let the soap cool down and solidify to the point where it will support the next layer.


FIVE: Next, cut a little white melt and pour soap base, and melt it in the microwave for a about 10 seconds. You won’t need a lot, just enough for a thin line between the pink and green soap. To show you how little I needed for my four soaps, I used a small beaker to melt two cubes of white melt and pour soap base.
Make sure the soap is not too hot! The first time I did it, the white soap managed to break through the pink layer and you really want to avoid that. Once it’s relatively cool but still fluid, carefully pour a thin layer over the pink soap. If the tie handle is in the way, you should be able to remove it now.
Again, spritz the surface with alcohol and let it set before adding the next layer.


SIX: Next, cut some clear melt and pour soap and melt it in the microwave for only a very short time (10 seconds or so). Again you don’t need much, about twice as much as the white that you used previously.
SEVEN: Add a little bit of Green Fruit mica, enough to colour the soap green. And once the soap has cooled a little, so that it won’t melt the previous layer, carefully pour it over the white soap. Spritz with alcohol and let the soap set and cool down completely before unmolding.

Because melt and pour soap bases contain a high amount of glycerin, they attract moisture and will ‘sweat’ if not wrapped. You can either place them into cellophane bags or wrap them into cling wrap to store them.
Watermelon soap pops
Ingredients
- crystal clear melt and pour soap base
- white melt and pour soap base
- Sweetheart Rose mica
- Green Fruit mica
- Watermelon fragrance from Candlescience
- popsicle mold
- popsicle sticks
- 99% isopropyl alcohol
Directions
- Cut the crystal clear melt and pour soap base into small cubes and melt in the microwave in 10-20 second bursts.
- Mix in Sweetheart Rose mica until you get your desired shade of pink.
- Add fragrance (1 teaspoon for each cup of soap) and poppy seeds and give it a good stir.
- Pour into the popsicle mold, and place the popsicle sticks in the soap. Use tie handles to keep the sticks in place. Spritz with alcohol. Wait until the soap has set before continuing.
- Cut and melt a little bit of the white melt and pour soap base, enough for a thin layer.
- Pour it over the pink layer and spritz with alcohol.
- Cut and melt some more crystal clear melt and pour soap base, approximately twice as much as the white soap you used in the previous step.
- Add a little Green Fruit mica and stir to mix the colour into the soap.
- Let the green soap cool a little before pouring it over the white layer. Spritz with alcohol.
- Leave the soap to set and cool down completely before unmolding.
- Store the soaps wrapped, either in clear cellophane bags or cling wrap.
Hi,
Would you consider telling me where you got the mold for the soap?
Thank you,
Margarita
Hi Margarita! I won this mould in a competition a few years ago. I finally got round to using them, but not for the intended purpose! lol