

Difficulty: Intermediate
Time: 1 hr
Yields: 500 g of soap
I often get asked about a special soap recipe, because most soap makers don’t realise that any soap will work! Soap dough is actually a normal soap recipe that has gone through the saponification process but hasn’t been allowed to dry out (cure). It’s not a special formulation and doesn’t contain any special ingredients. Really, any soap can be used, and I often use my left over soap from other projects, either cut offs or the leftover in my soap pot, and will it turn into little soap beads or other soap decorations for my cupcakes. The trick is, as mentioned before, to not let the soap dry out. As long as you store it in an airtight plastic bag or container, the soap dough will keep for at least a month or longer.
You don’t have to use a special soap dough recipe, any left over soap that is still soft enough can be used!
However, there are times when you do need a bit more soap dough for larger projects, or if you want to prepare a batch ahead, so I have added a special soap dough recipe at the end of this blog post, which will give you a nice white soap base, like the one in the picture below. You can make the soap as usual using the cold process method, letting it set in the mold overnight, before unmolding and storing it in a plastic bag. The soap should be soft and pliable. If it is too wet and sticky just let it dry out a little longer. You can either use the soap as it is, or add micas, soap colourants, or natural colourants to colour the dough.
The consistency of the soap should be like play dough – easy to knead and mold. If the soap is a little too sticky, you can mix in a little corn starch. Take as much soap as you need for the project, and leave the rest in the bag, as not to dry out. Knead your soap before using. The warmth of your hands and the friction will help soften the soap and make it easier to work with. I do recommend wearing gloves, especially if the soap is less than 2 weeks old, although I have to admit I’m don’t always wear gloves when playing with my soap dough.

If you are very creative, you can shape your dough into any little creature or object. It’s just like working with play dough. There are some very creative people out there, have a look on YouTube and search for polymer clay or fondant miniature tutorials. To paint the shapes, mix a little mica with alcohol and using a small paint brush, just paint on the mica (for example eyes, shading, etc).
Here are some simple tutorials to check out and get you started:
- Mini roses
- Flowers
- Simple flowers
- Pineapples
- Bananas
- Little bees
- Miniature cup and saucer
- Easter chicks and nest
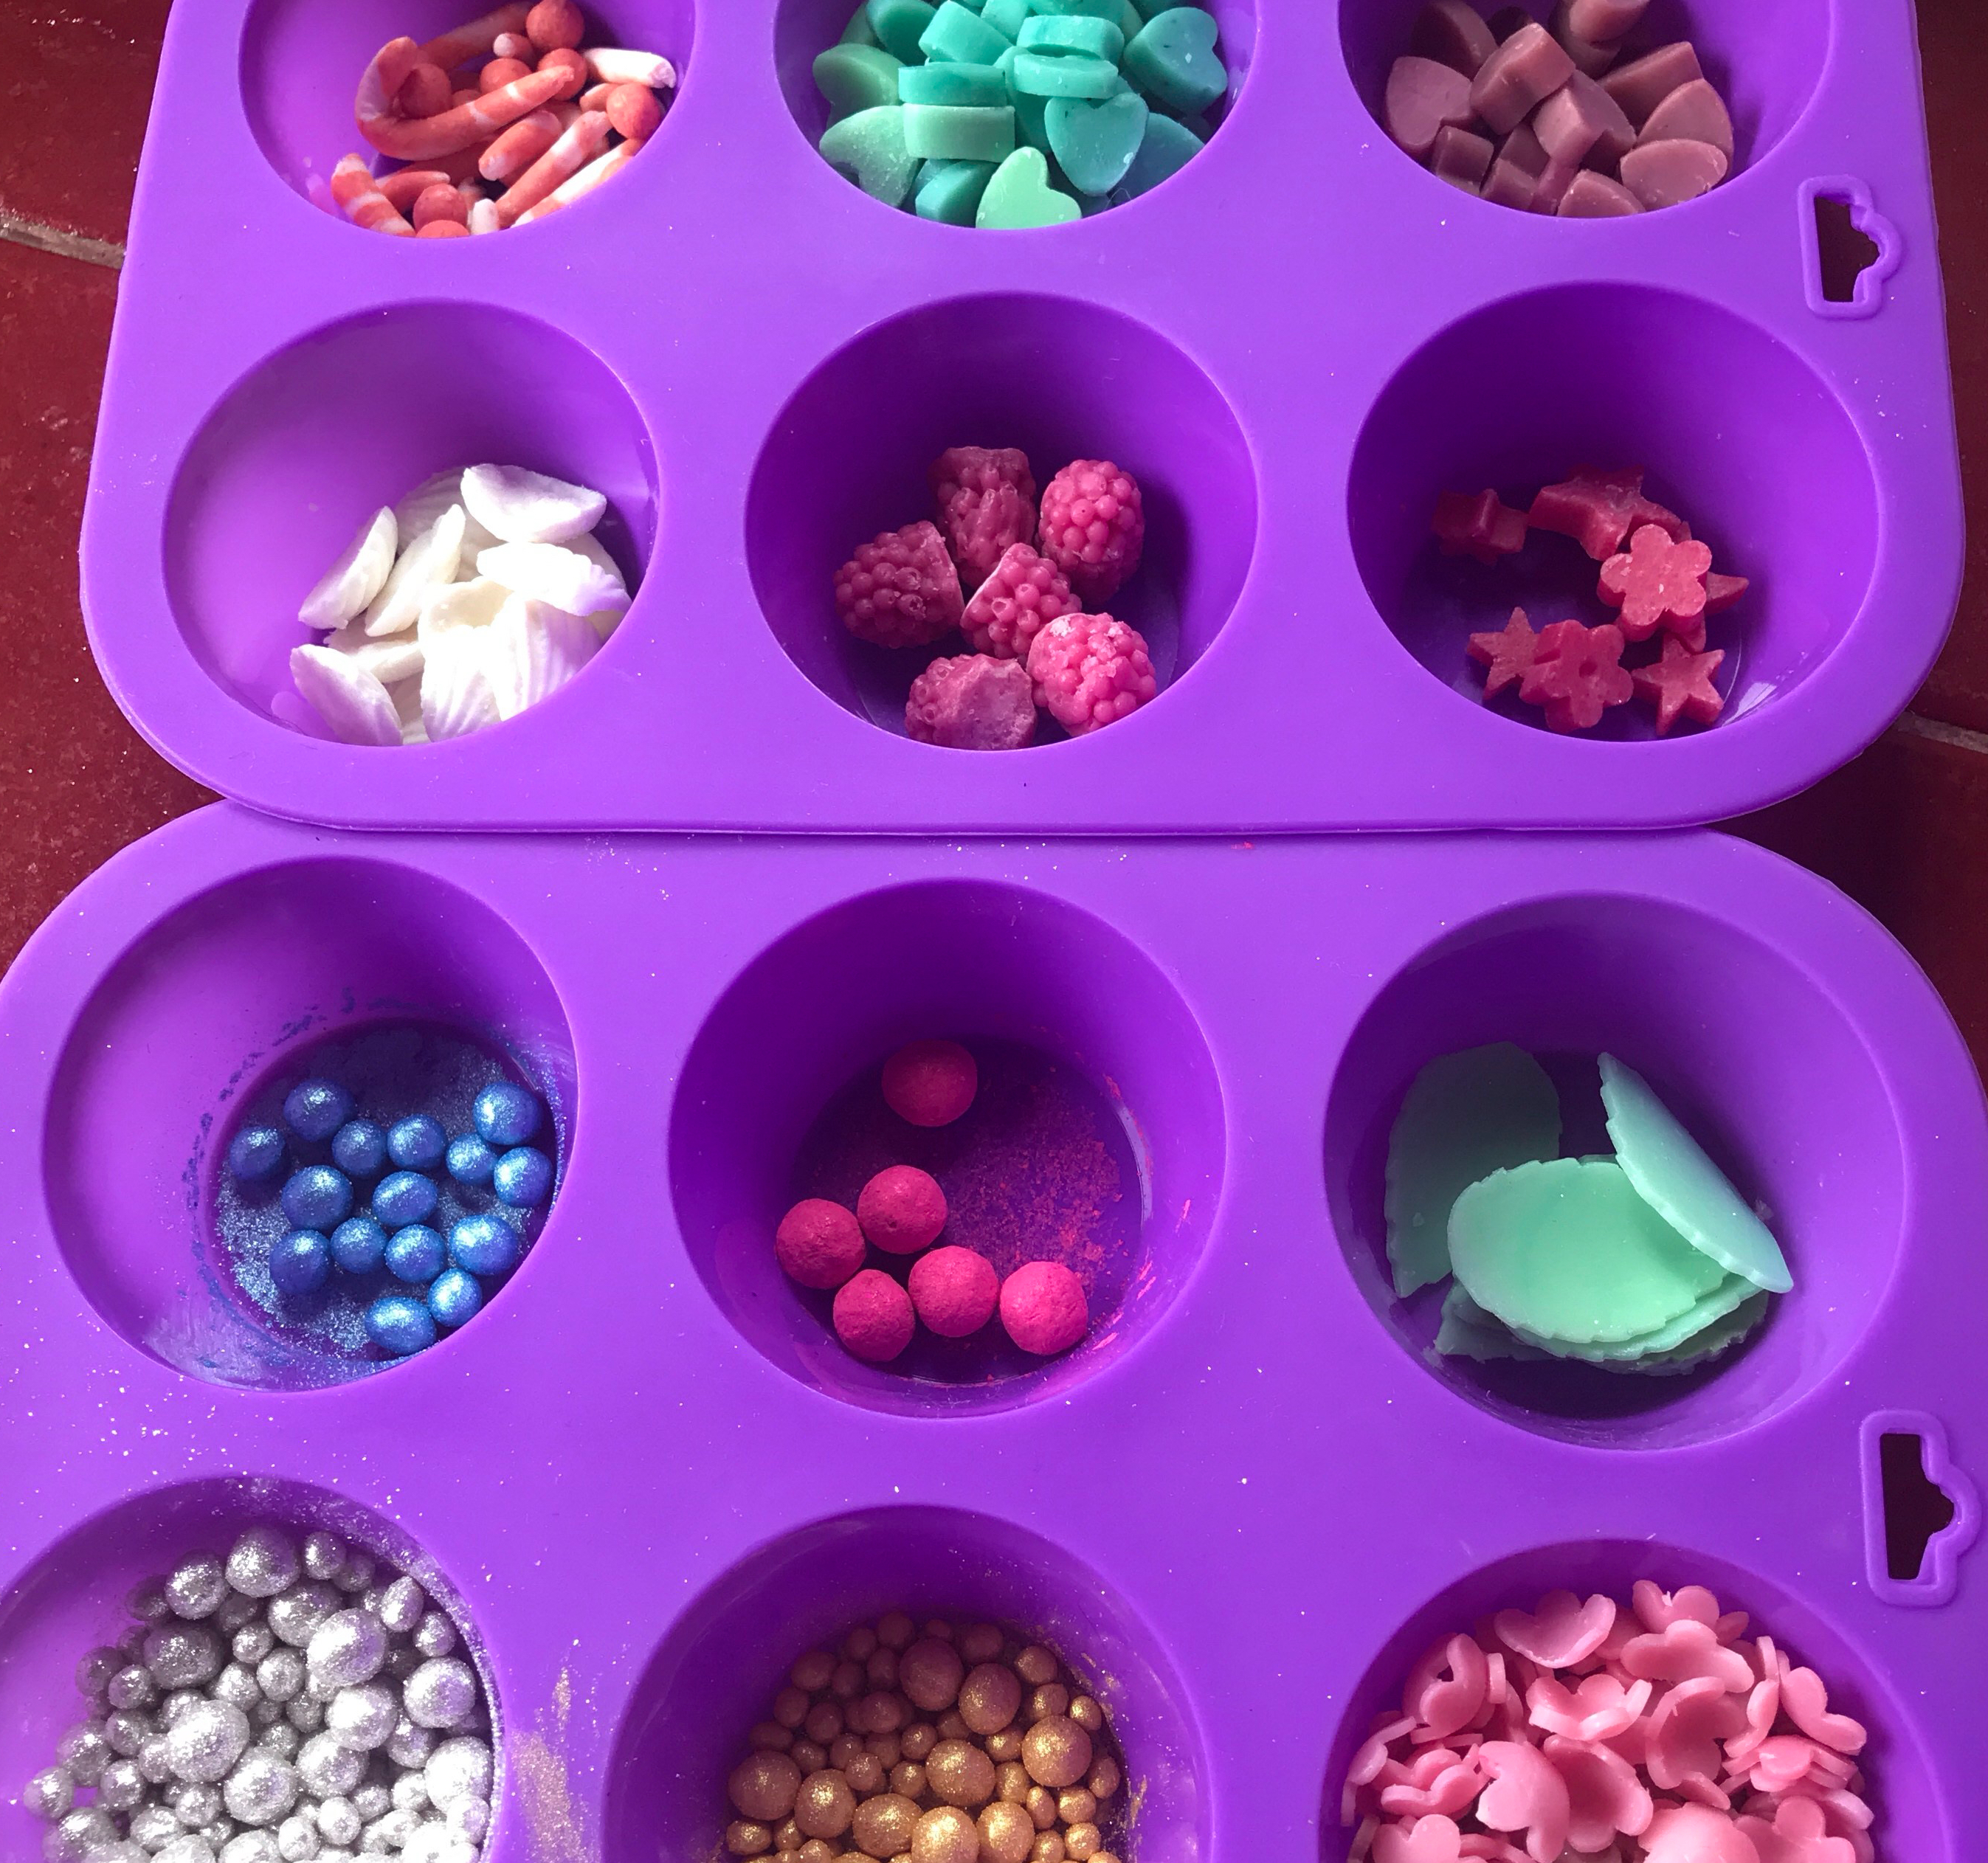
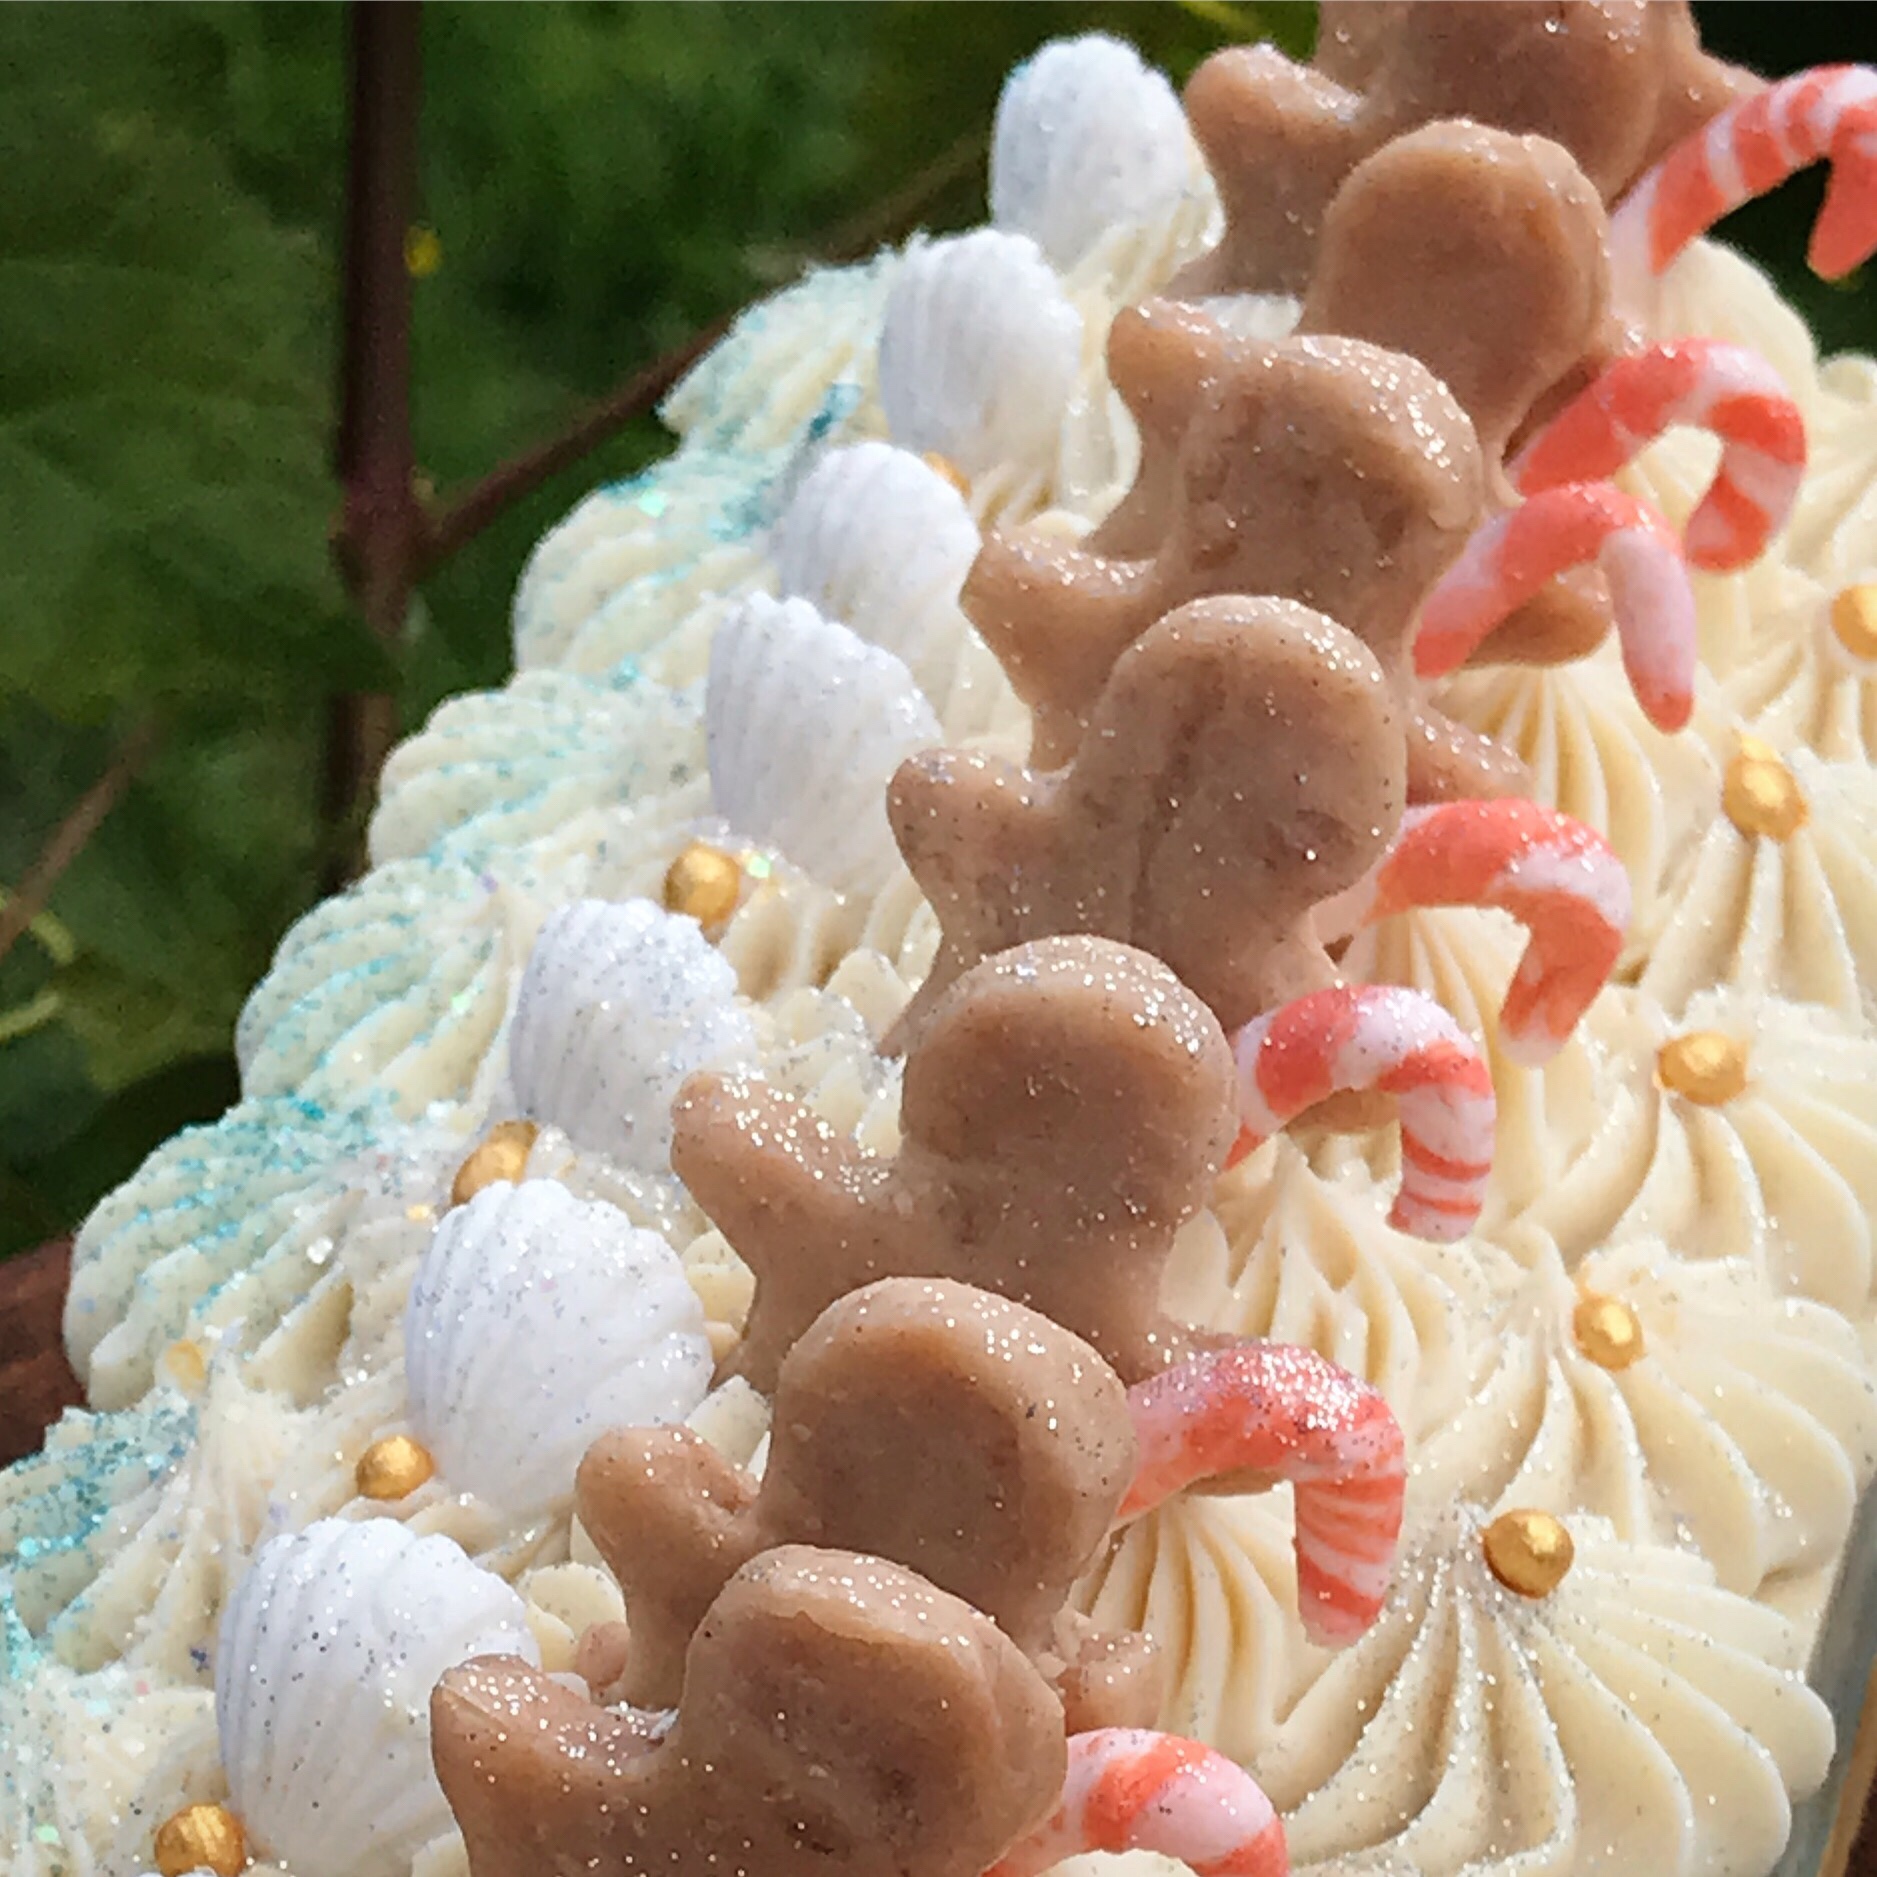
You can also use little silicon molds, such as berries or shells. Just press the soap into the mold and then carefully unmold. You can use the shapes straight away, but if you are planning on storing them, let them cure for a few weeks to harden before placing them into a container.


My favourite use for the soap dough is making little mica coloured soap pearls, which are so easy to make and great for embellishing your soap creations. Just roll your soaps into little balls with your hands, and place them in a little cup or container. Add a little mica, depending on how many beads you are making, about 1/4 teaspoon should be more than enough, and then swirl the beads around in the mica. When you take out the beads, give them a little shake to remove the excess mica, and store them in an open container to harden them and finish curing.
Here’s my favourite dough recipe, although as I mentioned before, you can just as easily use any left over soap from another project.
To make the dough base as white as the little shells in the picture above, I added titanium dioxide, which you can get from Pure Nature.
Soap dough recipe
Ingredients
- 140 g olive oil
- 100 g coconut oil
- 100 g sunflower oil
- 100 g cocoa butter
- 10 g castor oil
- 60 g caustic soda
- 140 ml water
- 1 teaspoon titanium dioxide
Directions
- Measure out the water into a heat proof Pyrex jug. Weigh out the caustic soda and carefully add it to the water, avoiding any splashes. Gently stir until all the caustic soda has dissolved and the lye water is clear.
- In a large heat proof Pyrex jug or pot, weigh out the coconut oil and cocoa butter. Heat in microwave (if Pyrex jug) or stove (if pot) until all the oil and butter has melted.
- Add the olive, sunflower and castor oils to the now-liquid coconut oil and cocoa butter, and give it a quick stir. Set aside.
- Prepare the titanium dioxide, by mixing 1 teaspoon of titanium dioxide with 2 teaspoons of water.
- Once the lye has cooled down to room temperature, and making sure you are still wearing protective goggles and gloves, carefully add the lye to the oils.
- Add the titanium dioxide mixture.
- Then, using a stick blender, pulse and stir until the oil/lye mixture has emulsified and thickened to medium trace.
- Pour the soap into the mold and leave to set overnight.
- The next day, unmold and check if the soap is not sticky anymore. If it is, let it cure for another day or so, just enough to dry it out a little more, but not enough to harden.
- Cut the soap up into cubes and knead them together, to make it soft and pliable. Make sure you are wearing gloves! The soap is still zingy!
- Store the soap dough in an airtight container or plastic bag until needed. It will keep for a month or longer.


Why does my soap dough have some nice molds portions but keeps some harder ‘beads’ I made a large batch and put in a container then sucked all of the air out. Did the middle get too warm?
Hi Soapnewbie! Yes, that’s one of the issues with soap dough. You have to prevent it from gelling, which is when the soap dough gets too warm. It can be tricky, because the chemical reaction, the saponification, is an exothermic reaction, meaning it produces heat. I always make sure that I soap at low temperatures to prevent this. That said, I have noticed differences depending on what colourants I have been using as well. My favourite colourants that seem to always produce a nice dough consistency are neon pigments – but I haven’t got the foggiest clue why that is. Enjoy your soap dough!
Hi Jackie. Thank you so much for this recipe. It’s one of very few vegey/ vegan recipes I’ve found online. I made a batch on Friday afternoon & used it to make some embeds today which are currently curing. I hope they turn out well as I’ve used silicone moulds….I have leftovers to mould into different shapes myself another time. It’s made a nice soap dough 😊
Thanks! Although I’m not vegan myself (and I do feel bad about it) many of my friends are. That’s why nearly all of my recipes are vegan. <3
Hi Jackie, I’ve only ever used M & P but wondering what’s the best way to store once made and for how long? Would they keep for 12 months for example? I only want to make the little beads at this point?
The soap dough will stay soft and keep for at least a year stored in an airtight container. It really depends on how airtight it is… Once you’ve made your little soap creations, they will harden when exposed to air and easily keep for several years. Hope this helps!
If you make a large batch of white soap dough, can you color it later? I know you can roll or paint on mica, but can you add mica and blend it in?
I’ve been meaning to reply for ages, but I never managed to test it before this. Yes, you can add colour in it afterwards, but it’s a messy process and the colours remain very pastel. I hope this helps!
Hi, what happens if you made an entire bar of soap out of the dough? Will it degrade when you leave it in a soap dish? Does it remain hard if I cured it?
You can use the recipe to make a whole bar of soap, and if you cure it as usual, it will go nice and hard. However, the recipe was formulated as a soap dough, and it could be a bit drying to the skin.
Hi Jackie, can I use this recipe, to roll out, and say cut small fall leaves with a cookie cutter, and stack them together to form a column embed to a soap I make?? Thanks!
Hi Eleanor! The dough works perfectly with cookie cutters. I do this in my kids workshops. If it gets a bit sticky, dust it with tapioca starch or pop it in the fridge for half an hour. Enjoy!
For the water is it really 140 ml and not 140g? Just to be sure
Hi Julie! Water is the only material where 1 gram water = 1 ml water. So it doesn’t matter if you weigh or measure it. That said weighing is more accurate, and I should probably change it to grams 😉
Thank Jackie for the information would love to atten your tutorial
Thank you! 🙂
Jackie,
Thanks so much for this recipe. I only learned of soap dough today and am super anxious to try it. I’ve been looking for a little way to uniquely jazz up my soap and this might be it. Thanks so much.
Alicia
Is this also good if i use the melt and pour soap process instead of the lye etc etc. will it gets hard as well? I’m planning to use it for embeds. Thanks!
Hi Aia! Unfortunately, you can’t make soap dough from melt and pour soap base. But there are some online soap shops, like sorcerysoap.com that sell soap dough already pre-made!